Maintenance > Human Resources > Events Maintenance > Job Events
Use this page to set up and maintain combinations of job events and job event reasons that may be associated with an employee's work record on the Jobs tab of the Workforce Administration page.
All job events and all combinations of job events and job event reasons that already have been defined display in a grid, with each row of the grid corresponding to a job event or combination of job event and job event reason. Data is sorted alphabetically by Job Event.
If a job event or combination of job event and job event reason is being used actively in the system, the Active column, located immediately to the left of the Job Event, will show a checked box. Also, if a job event refers to a secondary position that is vacated by an employee—for example, an umpire position that ends with the baseball season, the Out of Position column will show a checked box. If a job event refers to a civil service action, the Civil Service Action column will show a checked box.
Each combination of job event and job event reason must be unique.
- Press the <Tab> key from the last cell of the grid, and a blank row will be inserted at the bottom of the grid.
-
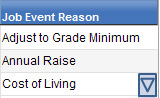
To select from a list of available events or event reasons, click in the appropriate cell to enable it and display the prompt button, and click the prompt button.
 Show me.
- To save your selections, click Save. (Also, each time you <Tab> out of a row, the selections will be saved.)
Note: A combination of job event and job event reason that has been used in the system may not be deleted.
- To edit a Job Event or Job Event Reason, click directly in the appropriate cell to enable it.
- Click the prompt button. A drop-down of valid entries will display.
- Select the entry.
- To check or uncheck the Active status, click directly in the corresponding check box.
- To save your edits, click Save.
Note: A combination of job event and job event reason that has been used in the system cannot be deleted.
In the row containing the combination of job event and job event reason to be deleted, click the delete icon ![]() , located in the column immediately to the left of the Activecolumn. A pop-up will ask you to confirm the delete.
, located in the column immediately to the left of the Activecolumn. A pop-up will ask you to confirm the delete.
If you need to create a new Job Event or Job Event Reason or change its description without leaving the page, hold down the <Ctrl> key, and click in the appropriate cell. The Validation Set Values page will open in a separate window. You may add and save the new event or reason from there, and it will be added to the appropriate drop-down on the Job Event Reason Maintenance page.
To generate a listing of all the data in this grid, hover over the Export button located in the bottom border of the grid. A drop-down menu will open, giving you the options to export data to PDF, Excel and XPS formats. Click the format you want. If selections in the grid have been modified, the Export button will be disabled until the selections are saved.
The bottom border of the grid contains four buttons. To see what a button does, click its image below:
